
ADVERTISEMENT
ADVERTISEMENT
ADVERTISEMENT
Table of Contents
ToggleBanana Cream Cheesecake – A No-Bake Dessert That’s Creamy, Dreamy, and Delicious
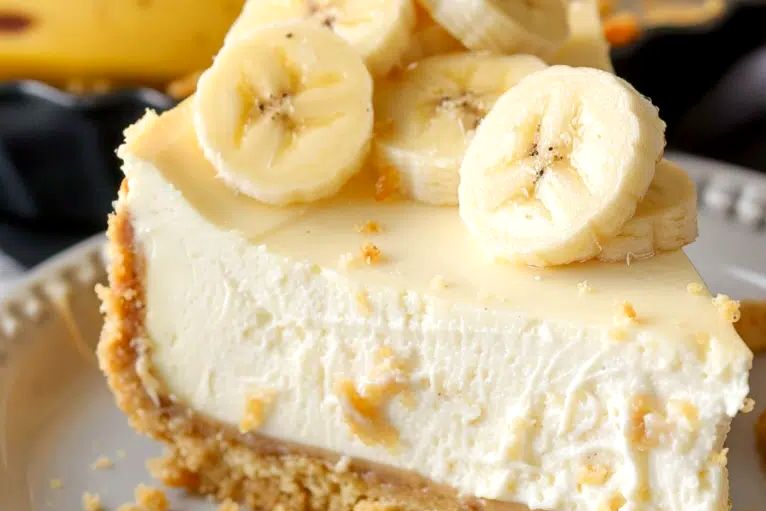
If you’re a fan of banana pudding and creamy cheesecakes, then get ready to fall in love with the ultimate hybrid: Banana Cream Cheesecake. This dessert blends the nostalgic comfort of banana cream pie with the richness of a classic cheesecake — all without the need to turn on your oven!
Made with a buttery vanilla wafer crust, a no-bake cream cheese filling, and fresh banana slices on top, this dessert is perfect for summer gatherings, potlucks, or anytime you crave something sweet, creamy, and full of banana goodness.
To master the art of no-bake cheesecakes, check out Sally’s Baking Addiction’s no-bake dessert tips and Tastes Better From Scratch’s banana desserts for more banana-based inspiration.
Why You’ll Love Banana Cream Cheesecake
This dessert isn’t just easy to make — it’s a showstopper! Here’s why:
-
Loaded with fresh banana flavor
-
No-bake — no oven required!
-
Creamy and rich, yet light and fluffy
-
Perfect for make-ahead desserts
-
Loved by kids and adults alike
The layers of flavor and texture — from the crunchy vanilla wafer base to the silky banana cheesecake filling — create a dessert that’s pure comfort with every bite.
Ingredients You’ll Need
You only need a few simple ingredients to whip up this banana cream cheesecake masterpiece.
ADVERTISEMENT

ADVERTISEMENT
For the Crust
-
2 1/4 cups vanilla wafer crumbs
-
10 tablespoons salted butter, melted
-
3 tablespoons granulated sugar
For the Filling
-
24 ounces cream cheese, room temperature
-
1 box (3.4 oz) instant banana pudding mix
-
1 cup cold milk
-
1 1/2 cups whipped topping (like Cool Whip or homemade)
-
1/2 teaspoon vanilla extract
-
Pinch of salt
For the Topping
-
1–2 fresh bananas, sliced
-
Extra vanilla wafer crumbs
-
Optional: caramel drizzle, whipped cream, or banana chips
Step-by-Step Instructions
Step 1: Make the Vanilla Wafer Crust
-
Crush the vanilla wafers in a food processor or place them in a ziplock bag and crush with a rolling pin.
-
Combine crumbs with melted butter and sugar in a mixing bowl.
-
Press the mixture firmly into the bottom of a 9-inch springform pan.
-
Chill in the refrigerator while you prepare the filling.
Step 2: Prepare the Banana Cream Cheesecake Filling
-
In a large bowl, beat cream cheese until smooth and fluffy (about 2–3 minutes).
-
Add the banana pudding mix and milk. Beat until fully combined and thickened.
-
Fold in the whipped topping, vanilla extract, and a pinch of salt.
-
Mix gently until smooth and creamy.
Step 3: Assemble the Cheesecake
-
Spread the filling over the chilled crust.
-
Smooth the top with a spatula.
-
Cover the cheesecake with plastic wrap or foil.
-
Refrigerate for at least 4–6 hours, preferably overnight for best results.
️ Serving Suggestions
This cheesecake is best served chilled and fresh from the fridge. Try one of these serving variations:
-
Top with caramel sauce or chocolate drizzle for extra indulgence.
-
Sprinkle with toasted coconut flakes or banana chips for texture.
-
Pipe swirls of whipped cream on top for an elegant finish.
-
Add crushed vanilla wafers or Nilla wafer halves for crunch.
Serve with a cup of cold milk, iced coffee, or banana-flavored milkshake for the ultimate treat.
Make Ahead & Storage Tips
This dessert is incredibly make-ahead friendly — in fact, it tastes even better after chilling overnight!
| Storage Method | Duration | Tips |
|---|---|---|
| Refrigerator | 3–4 days | Cover with plastic wrap |
| Freezer (Whole) | Up to 1 month | Wrap in plastic + foil tightly |
| Freezer (Slices) | Up to 2 months | Freeze slices with parchment between |
Easy Variations to Try
Want to switch things up? Here are some tasty variations for Banana Cream Cheesecake:
1. Banana Split Cheesecake
-
Add chocolate chips and a layer of crushed pineapple.
-
Top with strawberries, whipped cream, and a cherry on top.
2. Peanut Butter Banana
-
Mix 1/2 cup creamy peanut butter into the cheesecake filling.
-
Drizzle with chocolate syrup before serving.
3. Chocolate Crust Swap
-
Use Oreo cookie crumbs instead of vanilla wafers.
-
Adds a delicious contrast to the banana flavor.
4. Mini Cheesecakes
-
Press crust into muffin liners and fill with cheesecake mixture.
-
Chill and top each with a banana slice.
Tools You’ll Need
Here’s what you’ll need for flawless prep:
-
Mixing bowls
-
9-inch springform pan
-
Electric hand mixer or stand mixer
-
Silicone spatula
-
Food processor (optional, for crust)
Nutrition Information (per slice)
| Nutrient | Amount (approx.) |
|---|---|
| Calories | 380 |
| Total Fat | 28g |
| Carbohydrates | 29g |
| Protein | 6g |
| Sugars | 17g |
| Sodium | 220mg |
Note: Values will vary based on toppings and ingredients used.
When to Serve Banana Cream Cheesecake
This dessert is an all-season superstar. Here are a few perfect occasions:
-
Birthday parties
-
Family reunions
-
Summer BBQs or picnics
-
Holiday dessert tables
-
Romantic dinners or anniversaries
-
Baby showers & bridal brunche
❓ FAQs – Banana Cream Cheesecake
Can I use fresh banana puree instead of pudding mix?
You can! Just note the texture will be softer and more mousse-like. Add gelatin or cornstarch to stabilize the filling.
How do I keep bananas from browning?
Toss sliced bananas with lemon juice or wait until just before serving to place them on the cheesecake.
Can I make this cheesecake vegan?
Yes! Use:
-
Vegan cream cheese
-
Plant-based whipped topping
-
Dairy-free milk
-
Banana-flavored vegan pudding (or banana puree with thickener)
Can I use a graham cracker crust instead?
Absolutely. Graham crackers work wonderfully — just use the same ratio of crumbs, butter, and sugar.
Final Thoughts
Banana Cream Cheesecake is the ultimate dessert that combines flavor, texture, and ease of preparation. Whether you’re hosting a summer party or just want to treat yourself and your loved ones, this no-bake delight is guaranteed to satisfy your sweet tooth.
From its crunchy vanilla wafer base to its smooth banana cream filling, it’s a slice of heaven you can make ahead, customize, and enjoy year-round. Plus, it looks gorgeous and is perfect for sharing on social media or at the dessert table!
For more details, visit the full recipe
ADVERTISEMENT