
ADVERTISEMENT
ADVERTISEMENT
ADVERTISEMENT
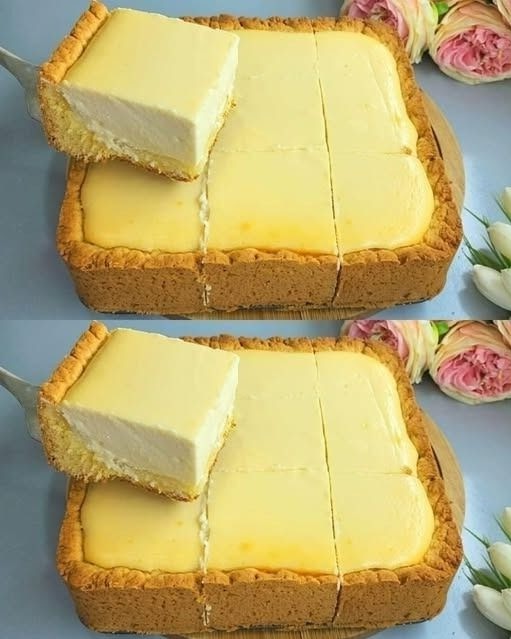
Creamy Dream Cheesecake Bars: The Ultimate Slice of Heaven
If you’re craving a decadent dessert that delivers maximum flavor with minimal fuss, look no further than Creamy Dream Cheesecake Bars. These rich, velvety treats combine the best parts of a classic cheesecake—buttery crust, silky smooth filling, and that perfect touch of sweetness—all in convenient, easy-to-serve squares.
Whether you’re planning a celebration, baking for family, or just satisfying a personal craving, these cheesecake bars are the perfect choice. Best of all, they require simple ingredients, come together quickly, and don’t demand any advanced baking skills.
Why You’ll Love These Cheesecake Bars
There are hundreds of cheesecake recipes out there, but what makes this one truly special?
-
No-fuss crust made from crushed cookies or graham crackers
-
Velvety texture from full-fat cream cheese and sour cream
-
Easily customizable with toppings like berries, chocolate drizzle, or caramel
-
Perfectly portioned for entertaining or snacking
-
Beginner-friendly and nearly fail-proof!
Looking to compare different crust options or try a no-bake version? Check out this helpful cheesecake crust guide from Sally’s Baking Addiction, which walks through multiple base variations to suit your style.
Ingredients for the Dreamiest Cheesecake Bars
Here’s everything you need to make your own creamy dream come true:
For the Crust:
-
2 ½ cups crushed biscuits or graham crackers
-
½ cup unsalted butter, melted
-
2 tbsp sugar (optional, if your cookies aren’t sweet)
For the Filling:
-
3 cups full-fat cream cheese (room temperature)
-
1 cup granulated sugar
-
3 large eggs
-
1 tsp pure vanilla extract
-
1 cup sour cream (or Greek yogurt for a slightly tangier finish)
Want to swap the sour cream for a dairy-free alternative? Minimalist Baker’s sour cream substitute is a great option for those avoiding lactose.
Step-by-Step Instructions
1. Prepare the Crust
-
Preheat your oven to 325°F (160°C).
-
Line an 8×8 or 9×9 inch pan with parchment paper for easy removal.
-
Mix crushed cookies, melted butter, and sugar in a bowl.
-
Press evenly into the bottom of the pan. Use the bottom of a glass to compact it firmly.
-
Bake for 10 minutes and let cool while you prepare the filling.
2. Make the Creamy Filling
-
In a large bowl, beat the cream cheese until fluffy and smooth.
-
Add sugar and beat again until well blended.
-
Mix in eggs one at a time, scraping down the sides of the bowl.
-
Stir in vanilla and sour cream until just combined. Don’t overmix to avoid cracking.
3. Bake to Perfection
-
Pour filling onto the cooled crust.
-
Tap the pan gently to remove air bubbles.
-
Bake for 45–50 minutes until edges are set but the center still jiggles slightly.
-
Turn off the oven and let the bars cool inside with the door slightly open.
❄️ 4. Chill and Slice
-
Once cool, refrigerate for at least 4 hours (overnight is best).
-
Use a warm knife to slice into clean squares. Wipe the blade between cuts for picture-perfect pieces.
Topping Ideas to Elevate Your Bars
While these bars are incredible on their own, here are a few ways to dress them up:
-
Fresh berries + powdered sugar
-
Salted caramel drizzle
-
Chocolate ganache
-
Lemon zest and crushed shortbread
-
Toasted coconut flakes
Try topping variations like these to match seasonal events or personal preferences.
Tips for Cheesecake Success
Even though this recipe is easy, a few tricks will help you get bakery-level results every time:
-
Room temperature ingredients mix more smoothly
-
Avoid overmixing once eggs are added
-
Cool slowly to prevent cracks
-
Always chill completely before slicing
Want even more pro tips? This cheesecake baking guide from King Arthur Baking breaks down everything from texture control to troubleshooting.
Make-Ahead & Storage Instructions
Planning ahead? These cheesecake bars are perfect for prepping in advance.
-
Store in the fridge for up to 5 days, tightly covered
-
Freeze for later: Wrap individual squares in plastic and store in an airtight container for up to 2 months
-
Thaw in the fridge overnight before serving
FAQs About Cheesecake Bars
❓ Can I use low-fat cream cheese?
You can, but full-fat gives the creamiest texture. Low-fat versions may result in a softer, slightly grainy filling.
❓ How do I avoid cracks?
Be gentle with your batter, don’t overbake, and cool slowly. If cracks still happen, a topping can cover them beautifully!
❓ Can I make this gluten-free?
Absolutely! Use gluten-free cookies or graham crackers for the crust. The filling is naturally gluten-free.
Why These Bars Are Perfect for Every Occasion
Creamy Dream Cheesecake Bars are one of those desserts that work for every season:
-
Spring/Summer: Top with fresh berries and lemon zest
-
Fall: Add cinnamon to the crust or swirl in pumpkin puree
-
Winter: Drizzle with melted chocolate or peppermint bits
They’re portable, easy to serve, and guaranteed crowd-pleasers. Whether you’re making them for a dinner party, baby shower, or holiday get-together, these bars are the sweet finish your guests will talk about long after dessert is over.
Final Thoughts
If you’re looking for a foolproof dessert that tastes like it came straight from a pastry shop, Creamy Dream Cheesecake Bars should be at the top of your baking list. With their silky filling, buttery crust, and endless customization options, they’re bound to become a staple in your kitchen.
Ready to impress your friends and family? Grab your ingredients, whip up a batch, and get ready to fall in love with your new favorite dessert bar.
Thank you for following me on Facebook & pinterest
for more recipes click here
ADVERTISEMENT