
ADVERTISEMENT
ADVERTISEMENT
ADVERTISEMENT
Table of Contents
ToggleHomemade Cheese with 3 Ingredients: Easy Step-by-Step Recipe
Making cheese at home might sound like something best left to professional cheesemakers, but the truth is: you can craft a delicious, creamy, and aromatic cheese right in your own kitchen with just three simple ingredients. No complicated equipment, no hard-to-find cultures—just milk, vinegar, and salt. And if you want to elevate it further, a touch of butter and herbs will make your homemade cheese irresistible.
In this article, we’ll walk you through everything you need to know about making homemade cheese: the ingredients, the process, variations, and tips to ensure success every single time. Whether you’re a complete beginner or someone who loves experimenting with DIY kitchen projects, this guide will show you how easy it can be to whip up fresh cheese that rivals what you’d buy at the store.
Why Try Homemade Cheese with 3 Ingredients?
Cheese is one of the most loved foods in the world, but store-bought varieties often come packed with preservatives, stabilizers, and artificial flavors. Making it yourself has several benefits:
-
Purity: You control every ingredient. No additives, no unnecessary fillers.
-
Freshness: The taste of freshly made cheese is far superior to pre-packaged options.
-
Cost-effective: With just a few everyday ingredients, you can make a batch of cheese for a fraction of the price of artisanal cheeses.
-
Customizable: Add herbs, spices, or seasonings to make the flavor truly yours.
-
Satisfying: There’s something deeply rewarding about crafting cheese with your own hands.
Ingredients for Homemade Cheese with 3 Ingredients
For this simple homemade cheese, gather the following:
-
1.5 liters full-fat milk (about 6 ⅓ cups)
-
2 tablespoons apple cider vinegar (30 ml)
-
Salt, to taste
-
Optional add-ins:
-
50 grams melted butter (¼ cup)
-
1 tablespoon Provencal herbs (15 ml)
-
A Note on Milk
Always use fresh, full-fat milk. Skim or ultra-pasteurized milk doesn’t curdle properly and will leave you with a weak texture. I’ve learned this the hard way—trust me, stick to whole milk for the creamiest results.
ADVERTISEMENT
ADVERTISEMENT
Step-by-Step Guide to Homemade Cheese with 3 Ingredients
Step 1: Heat the Milk
-
Pour the milk into a large, heavy-bottomed pot.
-
Place it over medium heat and stir occasionally to prevent scorching.
-
Warm it until you see small bubbles forming around the edges. Do not let it boil.
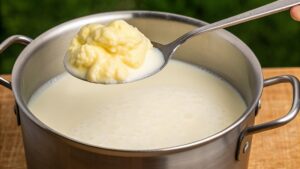
Step 2: Add Vinegar to Curdle
-
Slowly pour in the apple cider vinegar while gently stirring.
-
Almost immediately, the milk will separate into soft white curds and yellowish whey.
-
Stop stirring and let the mixture sit for 5 minutes. This allows the curds to firm up.
Step 3: Strain the Curds
-
Line a colander with cheesecloth or a clean kitchen towel.
-
Place it over a large bowl to catch the whey.
-
Pour the curdled milk into the colander.
-
Let it drain for 10–15 minutes until the curds hold together.
Step 4: Mix in Flavor
-
Gather the cheesecloth and gently squeeze out extra whey.
-
Transfer the curds to a mixing bowl.
-
Add salt for flavor.
-
Stir in melted butter for creaminess.
-
Add Provencal herbs for a fragrant, savory twist.
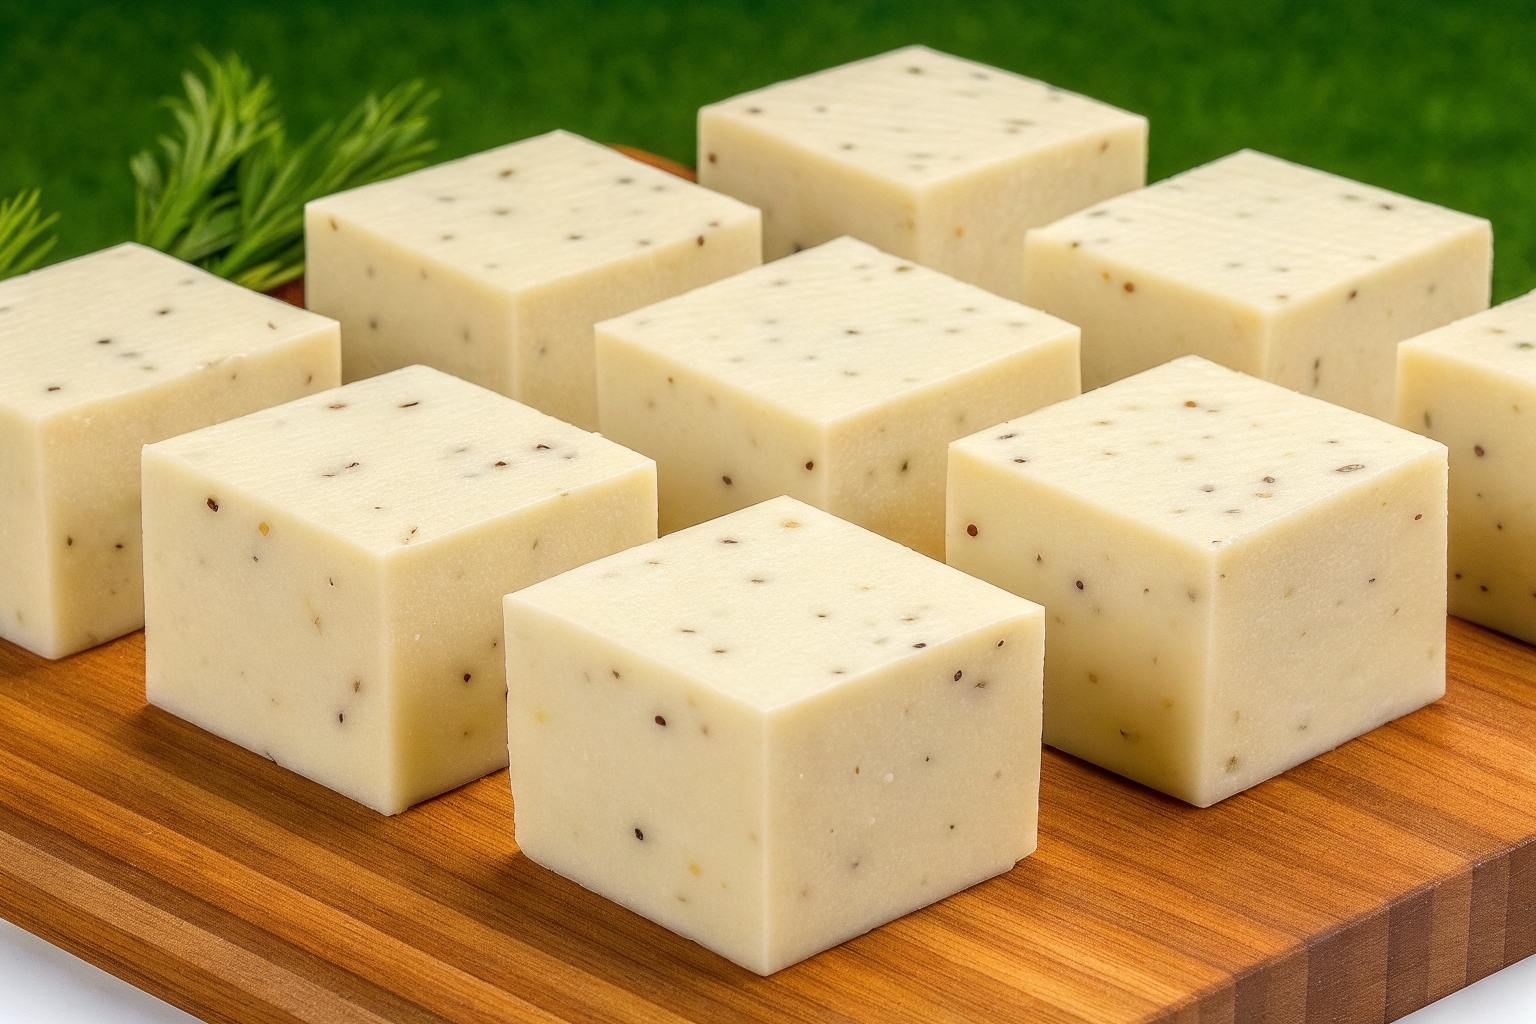
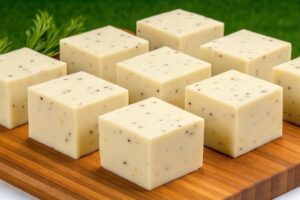
Step 5: Shape and Chill
-
Shape the cheese into a ball or press it into a mold for a firmer look.
-
Refrigerate for at least 1 hour to let it set.
-
Slice, spread, or crumble—it’s ready to enjoy!
Variations and Creative Twists
Once you’ve mastered the basic method, you can experiment with endless flavor profiles:
-
Herbed Cheese: Swap Provencal herbs for chives, dill, parsley, or basil.
-
Spicy Kick: Add chili flakes, cracked pepper, or paprika.
-
Garlic Infusion: Mix in roasted garlic for bold flavor.
-
Sweet Version: Add honey and a touch of cinnamon for a dessert-style cheese.
-
Nutty Texture: Fold in crushed nuts like almonds or walnuts before chilling.
How to Use Homemade Cheese
Homemade cheese is versatile and pairs beautifully with countless dishes. Try it in:
-
Breakfast: Spread on toast with tomatoes or avocado.
-
Salads: Crumble over fresh greens.
-
Pasta: Stir into warm pasta for instant creaminess.
-
Sandwiches: Layer into wraps, paninis, or baguettes.
-
Appetizers: Serve with crackers, olives, and charcuterie.
-
Baking: Use as a filling for savory pastries or stuffed breads.
Troubleshooting Tips
Even though the recipe is simple, small mistakes can affect the outcome. Here are common issues and fixes:
-
Curds not forming? The milk may be ultra-pasteurized, or the vinegar wasn’t acidic enough. Try lemon juice instead.
-
Cheese too crumbly? Add more butter or a splash of cream for richness.
-
Too salty? Start with a pinch and adjust after tasting.
-
Too soft? Let it drain longer or press it with a weight to remove more whey.
Health Benefits of Homemade Cheese
While cheese is naturally indulgent, homemade versions are healthier than store-bought:
-
No preservatives or additives—just clean, real ingredients.
-
High in protein and calcium, essential for bone and muscle health.
-
Probiotics (if made with raw milk) that can aid digestion.
-
Lower sodium than most packaged cheeses, since you control the salt.
Storage Tips
-
Refrigeration: Store your homemade cheese in an airtight container in the fridge. It will last up to 5 days.
-
Freezing: Not recommended, as it can alter the texture.
-
Serving: Let it sit at room temperature for 10 minutes before serving to bring out its full flavor.
Why This Recipe Works
What makes this recipe so magical is the simplicity. Milk contains proteins and fats that separate into curds and whey when exposed to acid and heat. By adding vinegar, we trigger this natural process. With a little salt, butter, and herbs, those curds transform into creamy, flavorful cheese.
This is the same principle used in traditional cheesemaking—just simplified for your kitchen. It’s both science and art, and the result is always rewarding.
Frequently Asked Questions (PAA Style)
Q: Can I use lemon juice instead of vinegar?
Yes! Lemon juice works just as well as vinegar to curdle the milk, though it gives a slightly tangier flavor.
Q: Can I make this cheese with non-dairy milk?
Most non-dairy milks don’t curdle the same way as cow’s milk. However, soy milk sometimes works with added acid. Expect a different texture.
Q: How long does homemade cheese last?
Stored in the fridge, it lasts up to 5 days. Always check for freshness before eating.
Q: Can I make this recipe vegan?
You’d need a plant-based milk that curdles (like soy) and vegan butter. The process will be slightly different.
Q: Do I need cheesecloth?
Cheesecloth works best, but you can use a clean dish towel or even a fine mesh strainer.
Final Thoughts
Homemade cheese with 3 ingredients proves that delicious food doesn’t need to be complicated. With milk, vinegar, and salt, you can create a creamy, flavorful cheese that’s worlds apart from supermarket options. Add butter and herbs for a gourmet twist, and you’ll have a spread or crumble that elevates everything from toast to pasta.
Once you try this recipe, you’ll wonder why you ever bought cheese at the store. It’s affordable, fun, and most importantly—delicious.
ADVERTISEMENT