
ADVERTISEMENT
ADVERTISEMENT
ADVERTISEMENT
Table of Contents
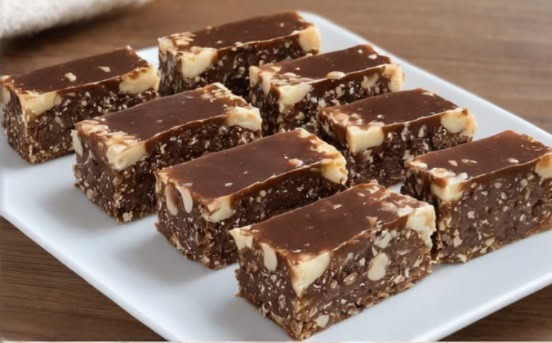
ToggleNo-Bake Chocolate Nut Bars: A Simple Yet Irresistible Treat
If you’re searching for the perfect homemade dessert that requires zero oven time, these No-Bake Chocolate Nut Bars are your dream come true. Packed with rich chocolate, crunchy nuts, and naturally sweet ingredients, this wholesome snack satisfies your cravings without the fuss of baking.
Whether you’re an experienced home baker or a kitchen newbie, these bars are incredibly easy to whip up. Plus, they’re perfect for meal prepping, lunchbox treats, or just an afternoon pick-me-up. And the best part? They’re customizable, healthy-ish, and absolutely addictive!
Why You’ll Love These Bars
These bars are more than just delicious. They’re also:
-
Naturally sweetened
-
No baking required
-
Protein-packed with nuts and oats
-
Kid-friendly and school-safe
-
⏳ Great for meal prep
Unlike overly processed store-bought bars, making your own gives you full control over the ingredients. Want to use almond butter instead of peanut butter? Go for it. Prefer cashews over peanuts? No problem.
The Beauty of No-Bake Desserts
In recent years, no-bake recipes have become incredibly popular among health-conscious foodies and busy families. The appeal lies in their simplicity and speed. Without needing to preheat an oven or babysit your dish, you can create a nutrient-dense snack that stores beautifully.
According to Healthline, no-bake snacks made with whole ingredients like nuts, oats, and seeds offer excellent nutritional value, making them ideal for energy bites, protein bars, and desserts.
Ingredients You’ll Need
Here’s a basic version of the recipe. Feel free to customize to your liking:
-
2 cups rolled oats (quick oats work too)
-
1 cup mixed nuts, chopped (almonds, peanuts, walnuts)
-
1/2 cup peanut butter (or almond butter for a milder taste)
-
1/3 cup honey or pure maple syrup
-
1/2 tsp vanilla extract (optional)
-
1/2 cup dark chocolate chips (for the topping)
-
1/2 cup white chocolate chips (optional swirl topping)
-
A pinch of salt
Optional Add-ins:
-
Chia seeds or flaxseeds for added fiber
-
Shredded coconut
-
Mini marshmallows for a Rocky Road twist
Step-by-Step Instructions
1. Prep Your Pan
Line an 8×8-inch baking dish with parchment paper, leaving overhang on the sides for easy removal.
2. Heat the Wet Ingredients
In a saucepan over low heat, gently melt the peanut butter and honey until smooth and combined. Stir in the vanilla extract and a pinch of salt.
3. Mix in the Dry
Turn off the heat. Stir in the oats and chopped nuts until fully coated. The mixture should be thick and sticky.
4. Press Into Pan
Pour the mixture into the prepared baking dish. Use a spatula or your hands to press it down evenly and firmly.
5. Melt the Chocolate
In a microwave-safe bowl, melt the dark chocolate chips in 20-second intervals, stirring in between. Pour over the oat base and spread evenly.
If using white chocolate, melt separately and drizzle over the dark chocolate. Use a toothpick to create swirls for a marbled look.
6. Chill
Place the bars in the fridge for at least 1 hour, or until the chocolate is fully set.
7. Slice & Serve
Once firm, lift the bars out using the parchment paper. Slice into squares or bars and enjoy!
ADVERTISEMENT

ADVERTISEMENT
Flavor Variations to Try
One of the best things about No-Bake Chocolate Nut Bars is their flexibility. You can change up the ingredients to suit your taste or dietary needs:
✅ Nut-Free Option
-
Use sunflower seed butter or tahini
-
Swap out nuts for pumpkin seeds or sunflower seeds
✅ Vegan Version
-
Use maple syrup instead of honey
-
Choose dairy-free chocolate chips
✅ Protein Boost
-
Mix in a scoop of your favorite protein powder
-
Add hemp hearts or chia seeds
Storage Tips
These bars store beautifully and stay fresh for:
-
1 week in the fridge, stored in an airtight container
-
Up to 2 months in the freezer, wrapped individually
Tip: Layer parchment paper between stacked bars to prevent sticking.
Serving Ideas
-
Crumble them over yogurt for a quick parfait
-
Pair with coffee for an afternoon energy boost
-
Pack in lunchboxes or gym bags for an on-the-go snack
Tips for Success
-
Press firmly when packing the mixture into the pan – this helps prevent crumbling.
-
Use a sharp knife when slicing to keep clean edges.
-
Chill thoroughly before slicing, especially if your kitchen is warm.
Why Homemade Bars Are Better
By making your own no-bake chocolate nut bars, you’re saying goodbye to preservatives, artificial flavors, and excess sugar often found in store-bought varieties. You also save money and reduce packaging waste—a win for your wallet and the planet.
Final Thoughts
No-Bake Chocolate Nut Bars are the ultimate fusion of ease, nutrition, and flavor. Whether you’re prepping snacks for the week, entertaining guests, or simply indulging in a late-night treat, these bars tick every box.
ADVERTISEMENT